How to Export and Implement Color Palettes in Adobe Photoshop & Illustrator
A powerful color palette is the backbone of any strong design. But its power is lost if you cannot use it consistently across documents, projects, and even different Adobe applications. Manually entering HEX codes for every new file is a tedious and error-prone process.
Professional designers know that efficiency and consistency are paramount, and that means mastering the tools within Photoshop and Illustrator to save, export, and implement color palettes seamlessly. This guide provides a comprehensive, step-by-step walkthrough for managing your color systems, ensuring your branding remains intact from the first sketch to the final export.
Managing Color Palettes at a Glance
- Swatches Panel is Key: The Swatches panel (
Window > Swatches) is the central hub for all saved colors in both Photoshop and Illustrator. - Save for Consistency: Saving colors to your Swatches panel ensures you can reuse them instantly in any document, eliminating guesswork and manual input.
- Export for Sharing: Adobe allows you to save the Swatches libraries as
.ase(Adobe Swatch Exchange) files, which can be shared and loaded by anyone with Creative Cloud apps. - Implementation is Universal: Saved swatches appear in all color pickers and tools (Fill, Stroke, Type), making application swift and consistent.
- Organization Prevents Errors: Using descriptive names and grouping colors into libraries prevents using outdated or incorrect brand colors.
Part 1: How to Save Colors to Your Swatches Panel
Before you can export a palette, you must first save the individual colors. The process is nearly identical in both applications.
In Adobe Photoshop:
- Select Your Color: Use the Eyedropper Tool (
I) to sample a color from your artwork, or define a precise color using the Color Picker (click the Foreground Color swatch). - Open the Swatches Panel: Go to
Window > Swatchesto open the panel if it isn't already visible. - Add the Swatch: Hover your mouse over the empty gray area at the bottom of the Swatches panel. Your cursor will turn into a paint bucket. Click to add the current Foreground color as a new swatch.
- (Optional) Name the Swatch: For better organization, especially with similar colors, you can name your swatches. To do this, hold
Alt(Option on Mac) and click the same empty area. A dialog box will appear prompting you to name the color and set its attributes.
In Adobe Illustrator:
- Select Your Color: Define a color using the Color panel (
Window > Color) or the Color Picker (double-click the Fill/Stroke box in the Tools panel). - Open the Swatches Panel: Go to
Window > Swatches. - Add the Swatch:
- Method A: Click the New Swatch icon at the bottom of the panel (it looks like a folded page).
- Method B: Simply drag and drop the color from the Fill/Stroke box directly into the Swatches panel.
- Name the Swatch: In Illustrator, the "New Swatch" dialog box appears automatically, allowing you to name the color and choose its color mode (RGB, CMYK, etc.) and type (Process, Spot).
Pro Tip: In both apps, you can select multiple objects that use your brand colors and then click the "New Color Group" icon in the Swatches panel. This will automatically create a group and add all the unique colors from your selection to it.
Part 2: How to Export and Save Color Palettes
Once your colors are saved in the Swatches panel, you can export them as a reusable library.
Exporting from Adobe Photoshop:
- Open Swatches Menu: Click the hamburger menu (☰) in the top-right corner of the Swatches panel.
- Save Swatches: Select Save Swatches... from the dropdown menu.
- Name and Save: A "Save" dialog box will open. Photoshop will default to saving the file in the
Presets > Color Swatchesfolder within your Adobe Photoshop directory. This is a good place for it. - Choose Format: The file will automatically be saved as an .ASE (Adobe Swatch Exchange) file. This is the key format that works across Photoshop, Illustrator, InDesign, and even Adobe XD. Give your library a clear, descriptive name (e.g.,
Brand_Primary_Palette.ase) and click Save.
Exporting from Adobe Illustrator:
- Open Swatches Menu: Click the hamburger menu (☰) in the top-right corner of the Swatches panel.
- Save Swatches: Select Save Swatch Library as ASE... from the dropdown menu.
- Name and Save: The same "Save" dialog box will appear. Again, it's best to save it as an
.asefile with a clear name. Illustrator may also suggest saving it in a compatible folder.
Why .ASE? The Adobe Swatch Exchange (.ase) format is the industry-standard way to share color palettes between all major Adobe Creative Cloud applications. By exporting your palette as an .ase file, you create a single, portable color source for your entire workflow and team.
Part 3: How to Import and Implement Color Palettes
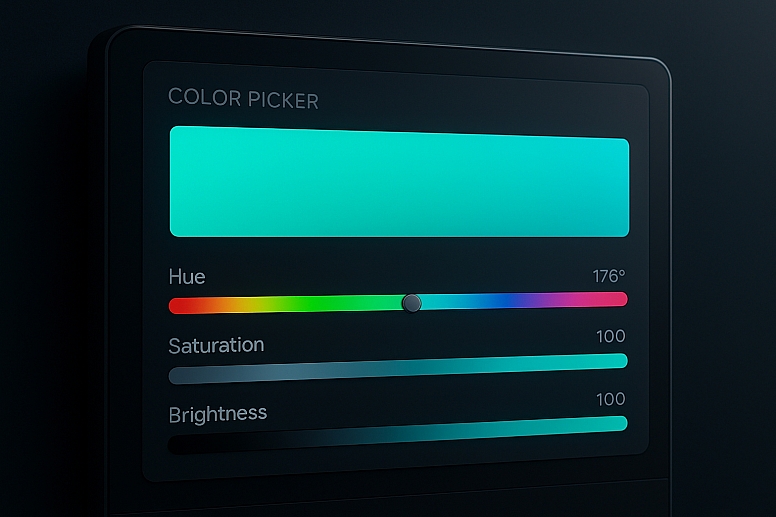
Now that you have an .ase file, you can load this palette into any new or existing document.
Importing into Adobe Photoshop:
- Open Swatches Menu: Click the hamburger menu (☰) in the Swatches panel.
- Load Swatches: Select Load Swatches... from the menu.
- Select Your File: Navigate to the location where you saved your
.asefile, select it, and click Load. - Implementation: Your imported swatches will now appear in the Swatches panel. You can click on any swatch to set it as your Foreground color. These colors will now be available in every color picker and tool within the document.
Importing into Adobe Illustrator:
- Open Swatches Menu: Click the hamburger menu (☰) in the Swatches panel.
- Open Swatch Library: Navigate to User Defined, and you should see your saved library listed there. If not, select Other Library... and browse to your
.asefile. - Implementation: The library will open in its own separate panel. Colors from this library panel behave exactly like those in your main Swatches panel. Click on a swatch to apply it to a selected object. To make the colors permanently available in the main Swatches panel for that document, drag them from the library panel into the main Swatches panel.
Part 4: Advanced Organization and workflow Tips
Managing large brand systems requires more advanced organization.
- Use Color Groups (Illustrator): Illustrator allows you to create groups within the Swatches panel. Drag swatches on top of each other to create a group. You can then double-click the group folder to name it (e.g., "Primary Colors," "Neutrals," "Accents"). This keeps your panel tidy and logical.
- Leverage Libraries (Creative Cloud): For ultimate cloud-based sync and access, use the Libraries panel (
Window > Libraries). You can add colors directly to a CC Library. These libraries sync across all your devices and can be shared with your team, ensuring everyone has access to the latest brand assets anywhere, anytime. - Document-Specific vs. Global (Illustrator): When creating a new swatch in Illustrator, you can check "Global." This links every instance of that color in your document to the swatch. If you double-click and edit a Global swatch, it will update that color everywhere it is used in the document—incredibly useful for making swift, universal color changes.
- For Web Design: When designing for the web in Photoshop, use RGB color mode. When creating swatches, ensure they are set as "RGB" to maintain color accuracy for digital screens.
The Critical Step: Applying Your Palette

A saved palette is useless if not implemented correctly. Here’s how to ensure consistency:
- Define Roles: In your brand guide, specify the role of each color (e.g., Primary Blue, Error Red, Text Gray). Use the swatch names to reflect this.
- Use the Eyedropper: The Eyedropper Tool (
I) is your best friend. With a shape or text selected, use the Eyedropper to click on a swatch in your panel to apply that color instantly. This is faster than opening color pickers. - Style Everything: Don't just color shapes. Apply your brand swatches to:
- Text: Headlines, body copy, links.
- Borders and Strokes: Rule lines, dividers, outlined buttons.
- Effects: Inner Glows, Outer Glows, Strokes—any effect that uses a color can and should use a brand swatch.
Troubleshooting Common Issues
- Colors Look Different in Another Program: This is almost always due to a color profile mismatch. Ensure all your documents are using the same color profile (e.g., sRGB IEC61966-2.1 for web, U.S. Web Coated (SWOP) v2 for print). You can check and assign profiles under
Edit > Assign ProfileorEdit > Color Settings. - ASE File Won't Load: Ensure you are using the
Load Swatchescommand and notReplace Swatches. Replace will wipe your current swatches and load the new ones, while Load will add them to the existing collection. - Spot Colors from Illustrator Don't Appear in Photoshop: Photoshop handles Spot colors differently. They may be converted to process colors upon import. For precise print work, it's often better to manage colors within Illustrator.
Building a Professional, Efficient Habit
Manually inputting color values is a relic of an amateur workflow. By taking the time to save your colors in the Swatches panel and export them as shareable .ASE files, you build a system that pays dividends in saved time, eliminated frustration, and guaranteed brand consistency. This process is a non-negotiable step for any designer working within a brand system or across multiple projects.
Make it a habit. The next time you define a color you know you'll use again, save it immediately. Build your libraries over time. Your future self—and your collaborators—will thank you for the impeccable organization.
Answers to Common Questions
What's the difference between saving swatches in Photoshop vs. Illustrator? The core process is identical. The main difference is in the initial swatch creation dialog box. Illustrator provides more options upfront (naming, global vs. process, color mode) because it is more often used for precise branding and print work. Photoshop's method is simpler, focusing on the visual color value.
Can I use these .ASE files in other programs like Figma or Canva? No. The .ASE format is proprietary to Adobe. However, Figma, Canva, and other modern design tools have their own robust color style and palette features. To move a palette into Figma, you would typically manually input the HEX codes exported from your Adobe .ASE library (you can see the HEX code for any swatch in Adobe's Color Picker).
How do I delete old or unwanted swatches? To delete a single swatch, simply drag it to the trash can icon at the bottom of the Swatches panel. To clear multiple swatches at once, open the Swatches panel menu and choose Select All Unused, then click the trash can icon. This is a great way to clean up a messy document before saving a final, tidy swatch library.


